Saturday, December 5, 2020

Smitten Kitchen Sprinkle Cookies

 Recipe found HERE


3 cups (375 grams) all-purpose flour 
1 teaspoon baking powder 
1/4 teaspoon baking soda 
3/4 teaspoon fine sea or table salt 
1 cup (8 ounces, 225 grams or 2 sticks) unsalted butter, room temperature  
1/4 cup (2 ounces, 55 grams or 1/4 of an 8-ounce brick) cream cheese, room temperature
1 1/4 cups (250 grams) granulated sugar 
1 large egg 
2 teaspoons vanilla extract 
1/4 teaspoon almond extract 
1 cup rainbow sprinkles 

Heat oven to 375 degrees. Line two baking large sheets with parchment paper. Combine flour, baking powder, baking soda and salt in a bowl and whisk to blend. In a large bowl or the bowl of a stand mixer, beat cream cheese, butter and sugar until fluffy. Add egg and extracts and blend again. Add flour mixture and beat just until flour disappears. In some cases, this dough will feel too soft to roll into balls in your hands; if so, let it chill in the fridge for 20 minutes or so before using. 

Scoop balls of dough — I like these cookies best with a #40, or 1 1/2 tablespoon, scoop; the texture is less dynamic when made smaller — and roll them briefly in the palms of your hands before dropping them in a bowl of rainbow sprinkles and gently rolling to coat them evenly. I find that the sprinkles adhere much better to tacky exterior of balls of dough that have been briefly warmed by your hands — trust me here. 

Transfer balls of sprinkle-coated dough to baking sheets at least two inches apart. Use the bottom of a drinking glass to press down on the cookies until they are about 1/4 to 1/2-inch tall. If you see any bare spots in the sprinkles that bother you, you can sprinkle a few more on top. 

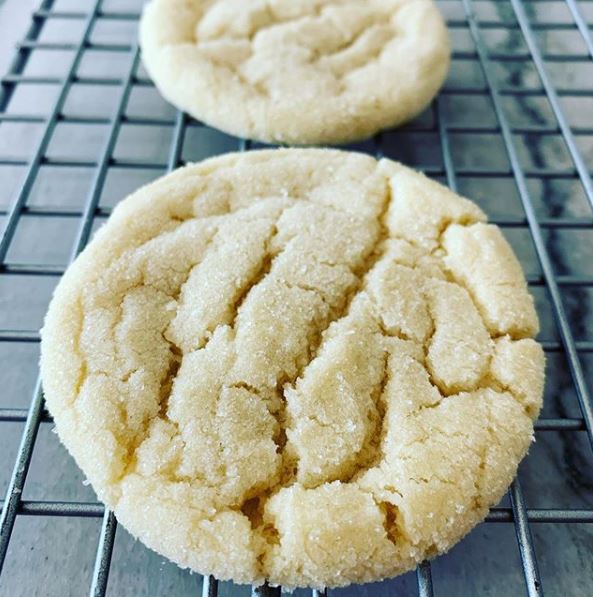
Bake for 9 to 10 minutes until they look underbaked but lightly golden underneath. [If they’re not quite soft in the center, they will be fully crisped through the next day.] Let set on the baking sheet on a rack for a few minutes before transferring to cooling racks to cool the rest of the way. Repeat with remaining cookie dough.

Saturday, October 10, 2020

DoubleTree Signature Cookie Recipe

Recipe Found HERE 

½ pound butter, softened (2 sticks)
¾ cup + 1 tablespoon granulated sugar
¾ cup packed light brown sugar
2 large eggs
1 ¼ teaspoons vanilla extract
¼ teaspoon freshly squeezed lemon juice
2 ¼ cups flour
1/2 cup rolled oats
1 teaspoon baking soda
1 teaspoon salt
Pinch cinnamon
2 2/3 cups Nestle Tollhouse semi-sweet chocolate chips
1 3/4 cups chopped walnuts 


Cream butter, sugar and brown sugar in the bowl of a stand mixer on medium speed for about 2 minutes. 

Add eggs, vanilla and lemon juice, blending with mixer on low speed for 30 seconds, then medium speed for about 2 minutes, or until light and fluffy, scraping down bowl. 

With mixer on low speed, add flour, oats, baking soda, salt and cinnamon, blending for about 45 seconds. Don’t overmix. 

Remove bowl from mixer and stir in chocolate chips and walnuts.

Portion dough with a scoop (about 3 tablespoons) onto a baking sheet lined with parchment paper about 2 inches apart. 

Preheat oven to 300°F. Bake for 20 to 23 minutes, or until edges are golden brown and center is still soft. 

Remove from oven and cool on baking sheet for about 1 hour.

Cook’s note: You can freeze the unbaked cookies, and there’s no need to thaw. Preheat oven to 300°F and place frozen cookies on parchment paper-lined baking sheet about 2 inches apart. Bake until edges are golden brown and center is still soft.

Monday, August 3, 2020

Soft & Chewy Drop Sugar Cookies

Recipe Found HERE


1 cup (2 sticks, 16 tablespoons) butter, softened
1 1/3 cups granulated sugar
1 large egg
2 teaspoons vanilla extract
2 1/2 cups all-purpose flour
1/2 teaspoon baking powder
1/2 teaspoon baking soda
1/2 teaspoon salt
Additional granulated sugar or sprinkles, for rolling

Preheat the oven to 350 degrees F. Line two large, rimmed baking sheets with parchment paper and lightly grease with cooking spray. In the bowl of an electric stand mixer fitted with the paddle attachment or in a large bowl with a handheld electric mixer, cream together the butter and granulated sugar until lightly and fluffy, 3-4 minutes. Scrape down the sides of the bowl as needed.

Add the egg and vanilla and mix again for 1-2 minutes until the batter lightens in color. Scrape the sides of the bowl as needed.

In another bowl, whisk together the flour, baking powder, baking soda and salt. Add the dry ingredients to the wet ingredients and mix until combined.

Scoop the cookie dough into rounded balls (about 2 Tablespoons), roll in granulated sugar or sprinkles and place on the prepared baking sheets a couple inches apart (about 12 cookies per baking sheet).

Bake for 11-13 minutes until slightly crackly on top (but not much color around the edges or bottom to keep them soft and chewy). Let the cookies cool for a few minutes on the baking sheet before removing to a cooling rack to cool completely.

Thursday, July 30, 2020

Favorite Green Smoothie

Recipe Adapted from HERE

10 WW pts on green plan


1/2 small banana, frozen
3/4 cup mixed berries, frozen (I use strawberries, mango, and pineapple)
1 big handful of spinach (a very packed down 1 cup)
1 Tablespoon almond butter or nut butter of choice
1/4 - 1/2 avocado
1 Tablespoon golden flaxseed
1/4 cup whey protein powder (2 scoops collagen peptides or protein of choice)
1 cup unsweetened almond milk or milk of choice


Monday, July 13, 2020

Blonde No-Bake Kiss Cookies

Mariah M.

1 1/2 cups white sugar
1/2 cup brown sugar
1/2 cup milk
1/2 cup butter
4 cups instant oats
1 teaspoon vanilla extract
1/2 cup peanut butter
Hershey Kisses

In a medium sized sauce pan, bring the sugar, milk, & butter to a boil. Boil for 1 minute, then remove from heat.

Add oatmeal, vanilla, and peanut butter. Stir thoroughly. Drop onto wax paper, add kisses and let stand for 30 minutes.

Monday, May 25, 2020

Rustic French Apple Tart

Recipe Found HERE

Sunny A.


INGREDIENTS FOR THE CRUST
1-1/2 cups all-purpose flour, spooned and leveled
1/2 teaspoon salt
2 Tablespoons granulated sugar
1-1/2 sticks (12 tablespoons) very cold unsalted butter, cut into 1/2-inch pieces
1/4 cup very cold water

FOR THE FILLING 
1-3/4 lbs baking apples (3 large, Gala or other baking apple)
1/3 cup sugar
1 teaspoon vanilla extract
1 teaspoon cinnamon
2 Tablespoons unsalted butter, melted
1/8 teaspoon salt

FOR ASSEMBLING & BAKING 
1 Tablespoon all purpose flour
1 egg, beaten
2 Tablespoons turbinado sugar
1 Tablespoon apricot jelly or jam, optional for glaze

INSTRUCTIONS
Make the crust: Line a baking sheet with parchment paper. In a food processor fitted with the steel blade, combine the flour, salt and sugar. Pulse briefly to combine. Add the cold butter and process just until the butter is the size of peas, about 5 seconds. Sprinkle the ice water over the mixture and process just until moistened and very crumbly, about 5 seconds. Transfer the dough to a lightly floured work surface and knead a few times, just until it comes together into a cohesive ball. Pat the dough into a disk. Flour your work surface again and dust the dough with flour, as well. Using a rolling pin, roll into a circle 8 to 10 inches in diameter, turning and adding more flour as necessary so the dough doesn’t stick. Transfer the dough to the parchment-lined baking sheet and refrigerate while you prepare the filling (you’ll roll the dough out further on the parchment paper so go ahead and clean your work surface).

Make the Filling: Peel, core, and cut the apples into 1/8-inch-thick slices (you should have about 4 cups) and place in a large bowl. Add the sugar, vanilla, cinnamon, melted butter, and salt; toss to combine.

Take the dough from the fridge and slide the parchment paper onto the countertop. Roll the dough, directly on the parchment paper, into a 14-inch circle about 1/8 inch thick. It’s fine if the edges are a little ragged. Place the parchment and dough back on the baking sheet – the pastry should curve up the lip of the pan.

Assemble the tart: Sprinkle the flour evenly over the pastry. Arrange the apple slices on top in overlapping concentric circles to within 3 inches of the edge. Don’t worry about making it look perfect! It doesn’t make much difference in the end and you don’t want the dough to get too warm. Fold the edges of the dough over the apples in a free-form fashion, working your way around and creating pleats as you go. Patch up any tears by pinching a bit of dough from the edge.

Using a pastry brush, brush the pleated dough evenly with the beaten egg. Sprinkle half of the turbinado sugar over the top crust and half over the fruit. Chill the assembled tart in the fridge for 15 to 20 minutes.

Meanwhile, preheat the oven to 350°F and set an oven rack in the center position.

Bake for 55 to 65 minutes, or until the apples are tender and the crust is golden and cooked through. (It’s okay if some of the juices leak from the tart onto the pan. The juices will burn on the pan but the tart should be fine -- just scrape any burnt bits away from the tart once it’s baked.) Transfer the pan to a rack and let cool.

While the tart cools, make the optional glaze. In a small bowl, mix the apricot jam with 1-1/2 teaspoons water. Heat in the microwave until bubbling, about 20 seconds. Using a pastry brush, brush the apples with the apricot syrup.

Use two large spatulas to transfer the tart to a serving plate or cutting board. Slice and serve warm or at room temperature. The tart is best served on the day it is made, but leftovers will keep, loosely covered on the countertop, for a few days.

Make Ahead: The dough can be made up to 3 days in advance and refrigerated. Allow it to sit at room temperature for about 15 minutes or until pliable before rolling.

Freezer-Friendly Instructions: The assembled tart may be frozen for up to 3 months. To freeze, place the baking sheet in the freezer until the tart is frozen, then wrap tightly. (Wait until right before baking the tart to brush the beaten egg and sprinkle the sugar onto the crust.) Bake directly from the freezer. (It may take a few extra minutes to bake from frozen.)

Saturday, May 2, 2020

Chipotle Chicken Quesadillas

The chicken mixture can be made up to 2 days ahead, cooled, covered, and refrigerated.

Recipe Found HERE


3 Tablespoons olive oil
1 large red onion, chopped (about 1-1/2 cups)
4 garlic cloves, minced
1/3 cup minced chipotle peppers in adobo sauce (you'll need about 6 chilis)
4 vine-ripened tomatoes (about 1-1/4 pounds), seeded and diced
3 scallions, thinly sliced
2 Tablespoons honey
2-1/2 cups cooked shredded chicken (white and/or dark rotisserie meat)
1 teaspoon salt
1/2 cup chopped cilantro
6 10-inch diameter flour tortillas
4 cups shredded sharp cheddar cheese
Sour cream, for serving (optional)
Lime wedges, for serving (optional)

INSTRUCTIONS
In a large sauté pan, heat the olive oil over medium heat. Add the onion and sauté until soft, about 5 minutes. Add the garlic and cook 1 minute more. Stir in the chipotle peppers and tomatoes. Cook until most of the liquid from the tomatoes has evaporated and the mixture is thickened, stirring often, about 20 minutes.

Stir in the scallions, honey, chicken, salt and cilantro. Keep warm.

Heat a sauté pan/griddle over medium heat and spray lightly with nonstick cooking spray. Lay a tortilla in the pan and heat until hot to the touch but not crisp (air pockets may form). Flip the tortilla over, then sprinkle 2/3 cup of the cheese evenly overtop, being careful to keep it off the pan.

Spread a generous 1/2 cup of the chicken mixture over half of the tortilla. When the cheese is mostly melted, fold the tortilla over to cover the filling and form a half-moon shape. Cook until the tortilla is crisp and golden and the cheese is melted, adjusting the heat as necessary, a few minutes per side. Repeat with the remaining tortillas.

Let the quesadillas rest a few minutes to allow the filling to set, then cut into wedges. Serve with sour cream and lime wedges, if desired.

Note: If you have a large griddle, use that to make the quesadillas so you can make a few at a time. Also, be sure to serve your quesadillas hot of the pan (or off the griddle), otherwise, they’ll get soggy and the cheese will harden. If this does happen, you can pop them in a 350 F degree oven to heat them up, but they won’t be as crisp and gooey as they are fresh.

Chicken Nachos

Recipe Found HERE

You can easily prepare the chicken the day before or in the morning, to throw together later. One pan is enough for about 4-5 people. 


FOR THE CHICKEN
2 Tablespoons extra-virgin olive oil
1 small yellow onion, diced
2 large cloves garlic, roughly chopped
1 (8-oz) can tomato sauce
2 tablespoons minced chipotle peppers in adobo sauce, plus 1 tablespoon sauce from can
1/4 teaspoon sugar
1 teaspoon ground cumin
1/2 teaspoon dried oregano
1/4 teaspoon salt
3 cups shredded cooked chicken, from 1 rotisserie chicken
1/4 cup fresh chopped cilantro (optional)

FOR THE NACHOS
1 (13-oz) bag tortilla chips
7 cups (28 oz) shredded Mexican blend cheese
2/3 cup grated Pecorino Romano cheese (optional)
1/4 cup finely sliced scallions, from 2 to 3 scallions
1/4 cup fresh chopped cilantro

FOR SERVING (OPTIONAL)
Guacamole
Sour cream
Limes wedges

INSTRUCTIONS FOR THE CHICKEN
Heat the oil in a large pan over medium heat. Add the onion and cook, stirring frequently, until soft and translucent, about 4-5 minutes. Add garlic and saute, stirring constantly for 1 min (garlic can burn fast). Do not brown; reduce the heat if necessary.

Add the tomato sauce, chipotle peppers and sauce, sugar, cumin, oregano, and salt. Bring to a gentle boil, then reduce the heat to low and simmer, uncovered, for about 10 minutes. Stir in the chicken and cilantro.

FOR THE NACHOS
Preheat the oven to 425°F and set two racks in the center of the oven. Arrange the tortilla chips in a single layer, overlapping slightly, on two 13 x 18-inch baking sheets. Spread the chicken evenly over the chips, followed by the cheeses. Bake until the cheese is melted, 5 to 8 minutes.

Remove the nachos from the oven, then sprinkle with scallions and cilantro. Serve immediately, passing the guacamole, sour cream, and lime wedges separately.

Make-Ahead Instructions: The chicken mixture can be made in advance and refrigerated up to 2 days ahead of time. Warm the chicken to room temperature in the microwave before assembling the nachos.


Fresh Guacamole

Recipe Found HERE

3 avocados, ripe
1/2 cup onion, finely diced
2 Roma tomatoes, diced
3 Tablespoons, fresh cilantro, chopped
1 jalapeno pepper, seeds removed and finely diced
2 garlic cloves, minced
1 fresh lime, juiced
1/2 - 1 teaspoon sea salt, salt to taste


Slice the avocados in half, remove the pit and skin and place in a mixing bowl. Mash the avocado with a fork and make it as chunky or smooth as you'd like.

Add the remaining ingredients and stir together.

To store or make ahead:
Place your leftover guacamole in a storage container and pat it down firmly with a spoon so it’s nice and flat on top. Add about 1/2 inch of cold water on top. Place the lid on the storage container and store it in the fridge. When you want to enjoy the guacamole, drain the water off the top, give it a stir and you’re good to go.

Sunday, April 26, 2020

Chili Lime Chicken Tacos with Mango Salsa

PREP IN ADVANCE TO MARINATE

For an even easier meal, buy fresh mango salsa already made at the grocery store.

Recipe found HERE 


CHILI LIME CHICKEN

2-3 pounds boneless, skinless chicken breasts
1 Tablespoon chili powder
1 1/2 teaspoons ground cumin
1 teaspoon paprika
1 teaspoon dried oregano
1 teaspoon onion powder
1 teaspoon garlic powder
1 teaspoon coarse kosher salt
1/2 teaspoon black pepper
1/4 teaspoon cayenne pepper
3 Tablespoons fresh lime juice (from about 2-3 limes)

MANGO SALSA

1-2 mangoes, peeled, pitted and diced (for about 1-2 cups chopped mango)
1/2 cup small diced red pepper
1/2 cup finely chopped red onion
1 jalapeno, seeds and membranes removed, finely diced
1/2 cup chopped fresh cilantro
1 tablespoon fresh lime juice
1/4 teaspoon ground cumin
Pinch of salt and pepper

AVOCADO CREAM SAUCE

2 avocados (pitted and flesh scooped out)
1/2 cup sour cream
2 Tablespoon fresh lime juice (from about 2 limes)
1/4 teaspoon salt
1/4 teaspoon pepper
1/4 teaspoon garlic powder
Handful of fresh cilantro leaves (about 1/4 to 1/2 cup)
Milk for consistency

EXTRAS

Tortillas for serving OR turn it into a main dish salad with romaine in place of the tortillas

For the chicken, place the chicken in a Ziploc bag or in a dish. Combine all the marinade ingredients (chili powder, cumin, paprika, oregano, onion powder, garlic powder, salt, pepper, cayenne and lime juice) and pour over the chicken. Refrigerate for a couple of hours (up to 8 hours).

Grill the chicken until cooked through (about 6-7 minutes per side on a grill preheated to medium-high heat).

Let the chicken rest for 5 or so minutes before slicing into strips or shredding.

For the mango salsa, combine all the ingredients in a medium bowl and give it a good stir. Refrigerate until ready to serve; can be made a day or so in advance if you have the willpower not to eat it all before you serve it with the tacos.

For the avocado cream, combine all the ingredients except the milk in a blender and process until smooth. Add milk, a tablespoon at at time, until the sauce is at the right consistency for drizzling (not too thin!). To serve, top each tortilla with chicken, mango salsa, and avocado cream.

You can also transition this very easily into a main dish salad by swapping out the tortillas for romaine lettuce.

Saturday, April 18, 2020

Cauliflower and Chickpea Curry

Recipe found here


1 medium onion, chopped finely
1 Tablespoon coconut oil
3 cloves of garlic minced
1 piece of ginger, peeled and finely grated
10 green cardamom pods, (optional)
1 medium head of cauliflower
1 green bell pepper, roughly chopped
1/2 heaped teaspoon dried red chili flakes
2 heaped teaspoon ground cumin
1 1/2 teaspoon ground coriander
1 teaspoon ground turmeric
2 heaped teaspoon garam masala
1/2 teaspoon sea salt
1 15.5 oz can of cooked chickpeas, rinsed and drained
1 14 oz can of petite diced tomatoes
1 13.66 fl oz can of full fat coconut milk
A small handful of fresh cilantro/coriander, leaves removed and chopped plus more for serving (optional)
Basmati rice

Heat the coconut oil in a large saute pan over a medium heat. Use a pan with a tight-fitting lid. Add the onion and cardamom pods and cook for about 10 minutes. Until the onion is translucent and a little springy and the pods have popped open.

Add the garlic and ginger and cook for about 2 minutes, then add the spices and salt. Stir well and cook for about a minute, until the spices release their flavor.

Now pour in the chopped tomatoes plus about 2 ounces of water added to the empty can. Stir well, then add in the chickpeas, cauliflower and pepper. Cover the pan, reduce the heat then simmer for about 5 minutes, stirring occasionally so the sauce doesn't stick to the bottom of the pan. This will also steam the cauliflower.

After 10 minutes, pour in the coconut milk stir well then simmer over a medium heat for 10 minutes, until the sauce reduces and thickens. Finally, stir in the chopped coriander and serve immediately.

Serve with basmati rice, toasted flaked almonds, more coriander leaves and naan.

NOTES
  • Heat. You can adjust the heat of this curry to suit your own tastes, by adding more or less of the chili flakes. This curry was made as a family-friendly meal, suitable for children.
  • Freezing. This curry can be frozen. Don’t add the fresh cilantro/coriander, then leave the curry to cool completely. Once cooled pour the curry into freezer-proof bags or containers, label the bag or container then freeze for up to a month. Thaw fully before reheating then add the coriander before serving.
  • Cauliflower. Use fresh cauliflower. The smaller the cauliflower florets are the quicker they will cook, keep them small.
  • Stir. Stir often to make sure the sauce doesn’t stick to the bottom of the pan and that the coconut milk doesn’t split.

Friday, April 3, 2020

Perfect 24 Cinnamon Rolls

Adapted from here

Sunny A.

ROLLS
2 cups whole milk
1/2 cup salted butter
1/2 cup sugar
1 1/4 teaspoons salt
2 teaspoons instant yeast
2 large eggs
6-7 cups unbleached all-purpose flour

FILLING
1 cup (2 sticks) salted butter
2 cups lightly packed brown sugar
2 Tablespoons ground cinnamon

FROSTING
8 ounces cream cheese, softened
1/2 cup (1 stick) salted butter, softened
1 teaspoon vanilla
2 teaspoons maple extract/flavoring (optional)
Pinch of salt
2 pounds powdered sugar
Cream or milk for consistency


INSTRUCTIONS
For the dough, heat the milk in a medium saucepan until the milk is scalded (which is basically heating it until right before it simmers - it will start steaming and little bubbles will form around the edge of the pan).

Pour the milk into the bowl of an electric stand mixer fitted with the dough hook. Add the butter, sugar and salt. Mix until the butter is melted and let the mixture cool until warm but not hot.

Add the yeast and eggs and mix until combined.

Gradually add the flour until the dough clears the sides of the bowl. The exact amount will depend on the temperature, humidity and how you measure flour.

The dough should be soft and just slightly sticky without leaving a lot of residue on your fingers. Let it knead for 2-3 minutes. Transfer the dough to a large, lightly greased bowl. Cover with lightly greased plastic wrap and let it rise until doubled.

Divide the dough in half. Roll each portion of dough (it's soft enough to be patted and stretched with your hands) into an 18-inch by 12-inch rectangle. Spread one stick of softened butter over each rectangle. Stir together the brown sugar and cinnamon and sprinkle half of it over each rectangle. Pat it in slightly with the palms of your hands.

Starting with one long end, roll up the cinnamon rolls as tightly as possible, pinching the seam lightly to seal. Working with one long log of cinnamon roll at a time, using a serrated knife, cut it in half. Then cut each half in half again (forming four equal portions). Cut each of the four portions into three rolls - twelve cinnamon rolls total. Repeat this with the other roll - you'll have 24 cinnamon rolls total.

Place the rolls evenly spaced on a parchment-lined large, rimmed baking sheet about 11X17-inches (or 12X18-inches). I space the rolls 3 across, 4 down. If the ends have come free, carefully tuck them under the cinnamon roll. Cover the pan with lightly greased plastic wrap and let the rolls rise until double.

Preheat the oven to 350 degrees F. Bake the rolls for about 18-22 minutes until only very slightly golden on top. Let the rolls cool almost completely in the pan before frosting.

FROSTING
For the frosting, in a large bowl, whip together the cream cheese and butter. Add the vanilla, maple and salt and mix until combined. Gradually add the powdered sugar and mix until thick and creamy.

Add cream or milk a tablespoon at a time until the frosting is smooth and spreadable to your liking. Spread the cinnamon rolls with frosting.

FREEZING
To freeze, once the cinnamon rolls are completely cooled, use a spatula to carefully transfer a single cinnamon roll to a quart-sized ziploc bag. Seal the bag with as little air inside as possible and freeze for up to a month.

To reheat, remove the roll from the bag and warm on a plate in the microwave for 1-2 minutes.


ALTERNATIVE TO CREAM CHEESE FROSTING
Powdered sugar
Butter
Milk
Vanilla

Tips for MAKING CINNAMON ROLLS AHEAD 

Saturday, February 1, 2020

Vanilla Buttercream

Eden D.

2 cups butter (4 sticks), at room temperature
6 cups sifted powered sugar
2 teaspoons vanilla
4 Tablespoons heavy cream
pinch of salt

In a bowl of an electric mixer, mix the butter on medium speed with paddle attachment for 2-3 minutes.

Slowly add powdered sugar while scrapping the bowl a few times.

Add vanilla, salt, and cream and mix on high for 5 minutes.

With a wooden spoon mix the frosting to get rid of the air bubbles.

Monday, January 13, 2020

New York Style Pizza Dough

PREP TIME FOR DOUGH TO RISE

Recipe Found HERE 

Article about how this recipe compares to others 

"This recipe, adapted from Roberta’s, the pizza and hipster haute-cuisine utopia in Bushwick, Brooklyn, provides a delicate, extraordinarily flavorful dough that will last in the refrigerator for up to a week. It rewards close attention to weight rather than volume in the matter of the ingredients, and asks for a mixture of finely ground Italian pizza flour (designated “00” on the bags and available in some supermarkets, many specialty groceries and always online) and regular all-purpose flour. As ever with breads, rise time will depend on the temperature and humidity of your kitchen and refrigerator."


153 grams 00 flour (1 cup plus 1 tablespoon)
153 grams all-purpose flour (1 cup plus 1 tablespoon and 2 teaspoons)
8 grams fine sea salt (1 teaspoon)

200 grams lukewarm water (a little less than 1 cup)
2 grams active dry yeast (3/4 teaspoon)
4 grams extra-virgin olive oil (1 teaspoon)

Food Scale
parchment paper
Semolina flour
1 15 oz jar pizza sauce (I prefer Le Roselli's, Amazon sometimes has it)
16 oz block whole-milk, low-moisture mozzarella (Polly-O recommended), will cover 3 pizzas
Desired Toppings

DOUGH
In a large mixing bowl, combine flours and salt.

In a small mixing bowl, stir together 200 grams (a little less than 1 cup) lukewarm tap water, the yeast and the olive oil, then pour it into flour mixture. Knead with your hands until well combined, approximately 3 minutes, then let the mixture rest for 15 minutes.

Knead rested dough for 3 minutes. Cut into 2 equal pieces and shape each into a ball. Place on a heavily floured surface, cover with dampened cloth, and let rest and rise for 3 to 4 hours at room temperature or for 8 to 24 hours in the refrigerator. (If you refrigerate the dough, remove it 30 to 45 minutes before you begin to shape it for pizza.)

MAKE THE PIZZA
Place each dough ball on a lightly floured surface/parchment (use the semolina flour for this) and use your fingers to stretch it, then your hands/fists to shape it into 10-12 inch rounds.

I bake it on a pizza steel 

Put the stone/pizza steel in the oven and preheat it on 500-550 degrees (your highest setting). I use my true convection bake/convection bake setting. Let the stone/pizza steel sit in the oven for at least 45-60 minutes BEFORE baking the pizza.

Top and transfer the assembled pizza onto the pizza stone (use a pizza peel or you can use a cookie sheet to do this). If you have the pizza lightly floured it should move back and forth easily on the peel or you can bake it with the parchment paper still underneath, if it's easier to just slide it all in on top of the pizza stone. Bake the pizza at 525 degrees for 5-7 minutes, watch not to burn. 

I have started putting the crust in for 2 minutes, then removing to put sauce/toppings, then back in oven for 3-4 minutes. 

We do 4-6 pizzas and as the door keeps opening the oven loses heat. Baking the crust first ensures a crispy crust on bottom without over baking the cheese. 

You can also GRILL THE PIZZA. Place the pizza stone on the grill and heat the grill to the highest temperature. This worked great and took about 4-5 minutes to baked each pizza. I put the pizzas in ready to go, no pre-baking the crust before adding toppings. 


Lisa's Favorite Toppings:
Green olives
red onion
roasted red peppers 
Fresh diced garlic
Fresh tomatoes

These pizza's were grilled outside on a gas grill. 


Thursday, January 2, 2020

Baked Sweet Potatoes


Preheat oven to 425 degrees

Scrub sweet potatoes and then prick all over with a fork. Place the potatoes on a baking sheet (lined with foil/parchment for easy clean-up). Bake until tender, or until a knife inserted in the thickest part has no resistance, about 45 minutes. Let cool slightly.

Split tops open with a knife and season as desired (butter, cinnamon sugar, or with salt and pepper etc).