Showing posts with label Breads and Jams. Show all posts

Wednesday, August 30, 2023

Bakery Style Lemon Blueberry Muffins


Phyllis E. 

Crumb Topping
5 Tablespoons butter melted 
½ cup sugar 
½ cup flour 
½ cup rolled oats (aka old fashioned oats) 
¼ teaspoon salt 

For the Muffins
2 cups all purpose flour (King Arthur Gluten Free Flour)
1 ½ teaspoons baking powder 
½ teaspoon salt 
½ cup butter softened 
1 cup sugar 
2 large eggs 
½ cup buttermilk 
finely grated zest of 1 lemon 
1 teaspoon vanilla 
2 cups fresh or frozen blueberries 

For the Glaze
3 Tablespoons lemon juice 
1 cup powdered sugar 

Preheat oven to 350˚F. Line a 12-cup muffin pan with paper liners 

Make the crumb topping by combining the melted butter, sugar, flour, oatmeal and salt. Stir with a fork until crumbs form. Set aside. 

Combine flour, baking powder and salt in a medium size bowl. Set aside. 

If using frozen blueberries, place them in a small bowl and return to freezer until ready to use. If using fresh berries, place in a small bowl and set aside. 

In the bowl of an electric mixer, beat butter for 1 minute until soft and fluffy. Add sugar and continue to beat for 3 minutes. Add eggs, one at a time and beat just until incorporated. Add buttermilk, vanilla and lemon zest and mix on low until combined. 

Remove bowl from mixer. Add flour mixture and stir, by hand, until flour disappears. Do not over mix or muffins will be tough. Gently stir in blueberries. 

Divide mixture evenly in the prepared muffin pan. Sprinkle with the crumb topping. 

Bake at 350˚F for 22 to 25 minutes or until light golden and a toothpick inserted into the center comes out clean. Allow muffins to cool for 5 minutes in the pan before removing to a wire rack. Drizzle lightly with the lemon glaze. 

For lemon glaze, combine powdered sugar and lemon juice in a medium size bowl. Stir with a fork or whisk until smooth.

Tuesday, April 5, 2022

Loni's Blueberry Buckle

Loni P. 

Crumb Topping

1/2 cup (100g) granulated sugar
1/3 cup (67g) packed light brown sugar 
1 teaspoon ground cinnamon 
1/8 teaspoon freshly grated nutmeg 
1 1/3 cups (167g) unbleached all-purpose flour
8 Tablespoons (1 stick/113g) cold unsalted butter, cut into 1/2 inch (1.5cm) cubes

For the Buckle
1 1/4 cups (156g) unbleached all-purpose flour
1 teaspoon (4g) baking powder, preferably aluminum free
1/4 teaspoon (1g) baking soda
1/2 teaspoon fine sea salt 
1/4 teaspoon ground cardamom
6 Tablespoons (85g) unsalted butter, at room temperature
3/4 cup (150g) granulated sugar
2 large (100g) eggs, at room temperature
1 teaspoon pure vanilla extract 
1/2 teaspoon grated lemon zest 
2/3 (160g) cup sour cream 
2 cups (340g) fresh or frozen blueberries (thaw before folding into batter 
confectioner's sugar for dusting

Position a rack in the lower third of the oven and preheat the oven to 350 F (175 C). Butter the sides of a 9 inch round cake pan and line the bottom with parchment. 

To make the crumb topping: In a medium bowl, combine both sugars, the cinnamon, nutmeg, and flour and stir until well blended. Cut in the butter with a pastry blender until the crumbs are the size of peas. Transfer the topping to a covered container and set in the freezer to chill while you mix the cake batter. 

To make the buckle: Sift together the flour, baking powder, baking soda, salt, and cardamom into a medium bowl. Set aside. 

In the bowl of a stand mixer fitted with the paddle attachment (or in a large mixing bowl, using a handheld mixer), cream the butter and granulated sugar together on high speed for 5 to 7 minutes, until light and fluffy. Reduce the speed to low and add the eggs one (50g) at a time, mixing well after each addition; scrape down the sides and bottom of the bowl with a rubber spatula as necessary. Mix in the vanilla, lemon zest, and sour cream.

With the mixer still on low speed, add the dry ingredients, mixing until just incorporated. Remove the bowl from the mixer stand (if using) and gently fold in the blueberries. 

Scrape the batter into the prepared pan and spread evenly with a spatula. sprinkle the crumb topping evenly over the top. Bake for 40 to 50 minutes until the top is golden brown and firm to the touch. 

Serve warm or at room temperature, right out of the baking dish. Sprinkle the top of the buckle lightly with confectioner's sugar just before serving. 

The buckle can be stored tightly covered, in the refrigerator for up to 3 days. 

Friday, April 3, 2020

Perfect 24 Cinnamon Rolls

Adapted from here

Sunny A.

ROLLS
2 cups whole milk
1/2 cup salted butter
1/2 cup sugar
1 1/4 teaspoons salt
2 teaspoons instant yeast
2 large eggs
6-7 cups unbleached all-purpose flour

FILLING
1 cup (2 sticks) salted butter
2 cups lightly packed brown sugar
2 Tablespoons ground cinnamon

FROSTING
8 ounces cream cheese, softened
1/2 cup (1 stick) salted butter, softened
1 teaspoon vanilla
2 teaspoons maple extract/flavoring (optional)
Pinch of salt
2 pounds powdered sugar
Cream or milk for consistency


INSTRUCTIONS
For the dough, heat the milk in a medium saucepan until the milk is scalded (which is basically heating it until right before it simmers - it will start steaming and little bubbles will form around the edge of the pan).

Pour the milk into the bowl of an electric stand mixer fitted with the dough hook. Add the butter, sugar and salt. Mix until the butter is melted and let the mixture cool until warm but not hot.

Add the yeast and eggs and mix until combined.

Gradually add the flour until the dough clears the sides of the bowl. The exact amount will depend on the temperature, humidity and how you measure flour.

The dough should be soft and just slightly sticky without leaving a lot of residue on your fingers. Let it knead for 2-3 minutes. Transfer the dough to a large, lightly greased bowl. Cover with lightly greased plastic wrap and let it rise until doubled.

Divide the dough in half. Roll each portion of dough (it's soft enough to be patted and stretched with your hands) into an 18-inch by 12-inch rectangle. Spread one stick of softened butter over each rectangle. Stir together the brown sugar and cinnamon and sprinkle half of it over each rectangle. Pat it in slightly with the palms of your hands.

Starting with one long end, roll up the cinnamon rolls as tightly as possible, pinching the seam lightly to seal. Working with one long log of cinnamon roll at a time, using a serrated knife, cut it in half. Then cut each half in half again (forming four equal portions). Cut each of the four portions into three rolls - twelve cinnamon rolls total. Repeat this with the other roll - you'll have 24 cinnamon rolls total.

Place the rolls evenly spaced on a parchment-lined large, rimmed baking sheet about 11X17-inches (or 12X18-inches). I space the rolls 3 across, 4 down. If the ends have come free, carefully tuck them under the cinnamon roll. Cover the pan with lightly greased plastic wrap and let the rolls rise until double.

Preheat the oven to 350 degrees F. Bake the rolls for about 18-22 minutes until only very slightly golden on top. Let the rolls cool almost completely in the pan before frosting.

FROSTING
For the frosting, in a large bowl, whip together the cream cheese and butter. Add the vanilla, maple and salt and mix until combined. Gradually add the powdered sugar and mix until thick and creamy.

Add cream or milk a tablespoon at a time until the frosting is smooth and spreadable to your liking. Spread the cinnamon rolls with frosting.

FREEZING
To freeze, once the cinnamon rolls are completely cooled, use a spatula to carefully transfer a single cinnamon roll to a quart-sized ziploc bag. Seal the bag with as little air inside as possible and freeze for up to a month.

To reheat, remove the roll from the bag and warm on a plate in the microwave for 1-2 minutes.


ALTERNATIVE TO CREAM CHEESE FROSTING
Powdered sugar
Butter
Milk
Vanilla

Tips for MAKING CINNAMON ROLLS AHEAD 

Friday, August 4, 2017

Double Chocolate Banana Bread or Muffins

Recipe found here 

3 very ripe bananas
1/2 cup (115 grams) butter, melted
3/4 cup (145 grams) brown sugar (I use dark here; either light or dark work)
1 large egg
1 teaspoon pure vanilla extract
1 teaspoon baking soda
1/4 teaspoon table salt
1 cup (125 grams) all-purpose flour
1/2 cup Dutch-process cocoa powder
1 cup (about 6 ounces or 170 grams) semisweet or bittersweet chocolate chunks or chips

Heat your oven to 350°F. Butter a 9×5-inch loaf pan, or spray it with a nonstick baking spray. Mash bananas in the bottom of a large bowl. (You’ll have a little over 1 cup mashed banana total.) Whisk in melted butter, then brown sugar, egg, and vanilla.

Place baking soda, salt, cinnamon (if using), flour and cocoa powder in a sifter or fine-mesh strainer and sift over wet ingredients. (My cocoa is almost always lumpy, so this is essential for me.)

Stir dry and wet ingredients with a spoon until just combined. Stir in chocolate chunks or chips.

Pour into prepared pan and bake 55 to 65 minutes, until a tester or toothpick inserted into the center of the cake comes out batter-free. Muffins bake 15-20 min.

Cool in pan for 10 to 15 minutes, then run a knife around the edge and invert it out onto a cooling rack. Serve warm or at room temperature. The banana bread will keep for up to 4 days at room temperature.
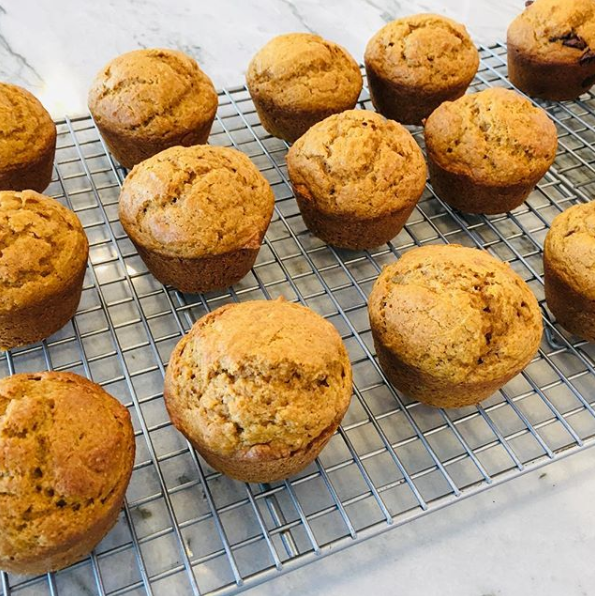
Pictured with Pumpkin Muffins 

Friday, March 31, 2017

Pumpkin Muffins

I use all whole wheat pastry flour instead of a white/wheat combo

Recipe found HERE 

2 1/2 cups (12.5 ounces) AP white flour
1 cup (5 ounces) whole wheat flour (King Arthur white wheat)
2 cups white granulated sugar
2 teaspoons baking soda
2 teaspoons ground cinnamon
1 teaspoon ground nutmeg
1 teaspoon salt
1 (15-ounce) can pumpkin puree
1/2 cup vegetable oil (I use avocado oil)
1/2 unsweetened applesauce
4 large eggs
2/3 cup buttermilk (or water)
1 to 2 cups semi-sweet or milk chocolate chips (optional), 2 cups is better 


Preheat the oven to 350 degrees F. Grease two 9-inch by 5-inch loaf pans or three 8 1/2-inch by 4 1/2-inch loaf pans or muffins pan (makes about 28 regular size).

In a large bowl mix flours, sugar, baking soda, cinnamon, nutmeg and salt together. Set aside.

In a medium bowl whisk together canned pumpkin, oil, eggs and 2/3 cup buttermilk, until well combined and stir into dry ingredients, just until the dry ingredients are moistened and no dry streaks remain.

Stir in the chocolate chips. Pour batter in prepared pans. Bake the bread for 50 to 70 minutes or until a toothpick inserted in the center comes out clean. Bake muffin tins 18-25 minutes. I dump muffins out after just cooling 1-2 minutes to make sure the bottoms don't get too done.

Remove the bread from the oven and let sit for 10-15 minutes. Run a knife gently around the edge of the bread and turn the bread out, right side up, onto a wire rack to cool completely.

May freeze. After cooling, wrap the bread in a layer of plastic wrap and then a layer of tin foil. Freeze for up to 2 months.

Tuesday, September 27, 2016

Hot Buttered Soft Pretzels

Recipe Found HERE 


For the Pretzels

  • 1 1/2 cups warm water (360mL) at 110F
  • 1 packet active dry or instant yeast (2 and 1/4 teaspoons)
  • 1 Tablespoon granulated sugar
  • 1 teaspoon salt
  • 2 Tablespoons unsalted butter melted and slightly cool
  • 4 cups all-purpose flour, plus more for sprinkling on counter (480g)
  • coarse sea salt for sprinkling flaked or coarse

For the Boiling:

  • 2/3 cup baking soda
  • 10 cups water

Instructions

  • Combine warm water, sugar and yeast in a large bowl or the bowl of your stand mixer. Mix together and set aside for 4 minutes or until it begins to bubble.
  • Add, salt, melted butter, and two cups of flour a cup at a time mixing with a spatula or wooden spoon in between.
  • Attach dough hook to your stand mixer (or electric hand mixer). Add the remaining flour a cup at a time while mixing on a medium speed. Mix for about 3 minutes or until the dough comes together and bounces back when pressed lightly with your clean finger. If your dough is still quite sticky you can mix in a ¼ cup of flour.
  • Transfer to a lightly floured counter and knead for about 4 minutes or until smooth and bouncy.
  • Important note - See my tips section below on how to do the windowpane test if you are unsure whether your dough has been kneaded enough or not.
  • Transfer dough to a large, lightly oiled bowl then cover with plastic and place in a warm place to rise for 40 minutes or until roughly doubled in size.
  • Divide dough into 8 pieces then roll into 20-24 inch ropes. Form a U shape with the dough then twist the two ends together at the top leaving about an inch and a half free. Loop the twisted portion down to form a pretzel shape. Repeat for the remaining ropes.
  • Preheat oven to 450F
  • Line two baking sheets with parchment paper or silicone mats. Bring 10 cups of water and the baking soda to a rolling boil then add the pretzels in one at a time for 30 seconds, remove with a slotted spoon, and place on your lined baking sheet.
  • Brush with the beaten egg and a teaspoon of water then sprinkle with coarse salt. Bake for about 12 minutes or until golden brown.

Notes

  • Instead of shaping these into traditional pretzel shapes, you can cut them into small pieces to make soft pretzel bites!
  • Use warm water to help activate the yeast, the dough will also prove much quicker this way. Make sure your water is warm and not hot though or it'll do the opposite!
  • Let the dough prove in a warm place, again make sure it's not too hot or in direct sunlight.
  • For that Auntie Annie's flavor, I recommend brushing melted butter on the pretzels before and after baking.
  • To reheat the pretzels and serve them warm you can reheat them in a hot oven for a few minutes or pop them into a microwave.
  • Do the windowpane test - a great way to know if your dough is kneaded enough is to do the windowpane test, here's how you do it. Remove a small piece of dough about the size of a golf ball and gently stretch it to create a thin membrane-like pane or windowpane, it should be thin enough to see light through it. If the dough breaks it means the gluten hasn't developed properly and you need to knead it for a little longer.
  • When it comes to baking recipes I always recommend weighing the flour with a kitchen scale because it's the only way to ensure accurate results every time but if you are using cups, fluff the flour in a bowl or container with a fork before spooning it into the cups. This way you have far less chance of overpacking the cup.
  • Since this makes 12 pretzels you'll need to boil them in batches.
  • Storing and freezing - raw or baked pretzels can be frozen for up to 3 months. Baked pretzels will keep well in an airtight container for 3-4 days.

Wednesday, February 26, 2014

***THE Southern buttermilk biscuits***

Recipe combined from here and here and here

Makes about 10-12 biscuits


If using a Cast Iron pan: 425 degrees, 16-18 min

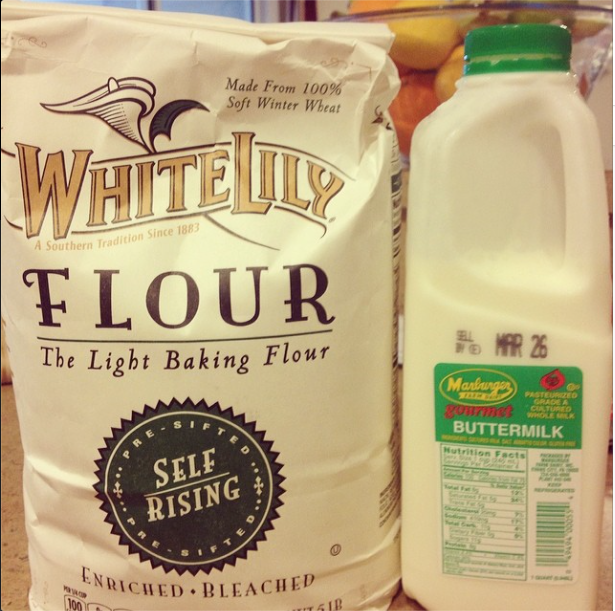
2 cups Self-Rising flour (White Lily preferred), plus more for dusting
4 Tablespoons cold butter, to cut in
1 Tablespoon un-salted butter, melted
1/4 cup cream cheese, cold (about 2 oz)
3/4 cup whole buttermilk  (If dough is dry may add a bit more, maybe 1-2 Tablespoons)
Maldon flaky salt*

Preheat the oven to 500°F for baking sheets.
425°F for cast iron pan 
Make sure the oven rack is in the middle position.

Measure the flour into a large bowl. Incorporate the cold butter and cream cheese into the flour, using a pastry blender or two knives. Cut butter into flour until it is crumbly.

Make a well in the center. Pour in the buttermilk and, using a fork to mix lightly, mix the flour into the buttermilk. The dough will be wet and messy.

Flour a work surface or a sheet of parchment paper works well too. Dump the dough from the bowl onto the surface.

Flour the top of the dough and the rolling pin. Roll out the dough to 1-inch thickness into an oval shape. Do not over handle the dough. Take the short sides of the oval and fold them in toward the middle, turn the dough, gently press down into a oval again and repeat. Repeat this folding once more and pat into desired thickness, usually about an inch or more. This folding creates flaky layers in the biscuits.

Use the biscuit cutter and start from the edge of the rolled-out dough and cut straight through the dough with the cutter, trying to maximize the number of biscuits cut from this first roll out. Roll out the excess dough after the biscuits are cut and cut more biscuits.

Place the biscuits on a baking sheet, or in a cast-iron skillet, or a baking pan with the biscuit sides touching. (It does not matter what size pan or skillet you use as long as the pan has a lip or sides and the biscuits are touching. 

Brush the tops with the melted butter. *Lightly sprinkle the biscuits with a few grains of flaky salt (such as Maldon). 

For extra flaky biscuits, chill the dough before baking until firm, about 10 minutes.

Place the pan in the oven and bake 10 to 12 minutes on a baking sheet, until light brown on top. 15-20 min for cast iron. Brush with butter again when you remove from the oven.


To Make Ahead: The unbaked biscuits can be frozen: Freeze biscuits in a single layer and transfer to a resealable plastic bag for up to one month. Bake straight from the freezer, adding a few minutes to the cooking time.

Note: You can freeze any leftover baked biscuits. To reheat, do not defrost. Wrap the biscuits in foil. Bake in a 400°F oven 25 to 30 minutes. Open the top of the foil for the last 3 to 5 minutes to brown a little on top.

White Lily Flour is (according to MANY websites) the preferred flour for Southern buttermilk biscuits. It is made from soft winter wheat and has a low protein count, so if you can fine a similar flour I'm sure it would work well too. Amazon sells White Lily. 


The Secrets to the Best Ever, Perfect Southern Buttermilk Biscuits

Secret #1 - Preheat the skillet. Just as you do with Southern cornbread, coat a cast iron skillet or with shortening, or butter or spray a rimmed baking sheet or cake pan with non-stick cooking spray. Preheat it in the oven just like with cornbread for about 5 minutes. (I didn't do this).

Secret #2 - Use very cold, self rising flour, and for the best biscuits, use a soft, winter wheat flour - like White Lily brand - and yes, it does make a difference! Just stick the flour in a bowl in the freezer the night before you plan to make biscuits. Do not substitute all purpose flour. (I just keep my self-rising flour in the fridge so it is cold).

Secret #3 - Use very cold fat from the refrigerator. It can be lard, vegetable shortening or pure butter, but my preference is butter. If using butter, cut the very cold butter half into cubes. Cut into the flour first using two knives or a pastry cutter until crumbly. When first learning to make biscuits avoid using your hands.

Secret #4 - Use buttermilk. Real buttermilk, not a vinegar and milk substitute. All good Southern biscuits contain real buttermilk. Period. If you don't tend to use buttermilk in your cooking, it will keep awhile, so just keep practicing on your biscuits with it and put some up in the freezer.

Secret #5 - Cold dough. Remember, a successful fluffy and light biscuit comes from keeping the dough cold and not handling it too much. The heat from your hands will melt the butter, so until you get to the point where you can literally mix and shape biscuits in about 5 minutes, use a gentle and soft touch because you do not want the dough to get warm!

Secret #6 - Folding. After quickly kneading, push the dough into a rectangle and fold the short sides in toward middle one on top of the other. Turn the dough, shape into a rectangle again and repeat. Repeat this folding once more for a total of three times and pat into desired thickness, usually about an inch or less. If you cut the biscuits too thick, they will quickly rise and lean over. The dough folding action creates flaky layers in the biscuits.

Secret #7 - No twisting! Use a cutter about 2 to 3 inches in size, cut them very close together and take care not to twist the biscuit cutter, whether it be a cutter or a juice glass, but only push down and lift up on the cutter. Twisting will cause the fibers in the edges of the biscuit to close and result in a flatter and more dense biscuit. So just press down and lift up - no twisting!!

Secret #8 - Spacing. I like to do my buttermilk biscuits in a skillet, which produces a crunchy crust on the bottom and soft edges. You may also bake them on a half sheet, rimmed baking pan or in a small greased cake pan. For biscuits that have more crunch all the way around, space them about an inch apart from each other. For soft biscuits, place them close together.

Secret #9 - High temperature. Bake your biscuits in a preheated 500 degrees F for 10 to 12 minutes or until golden brown and cooked through.

Wednesday, November 30, 2011

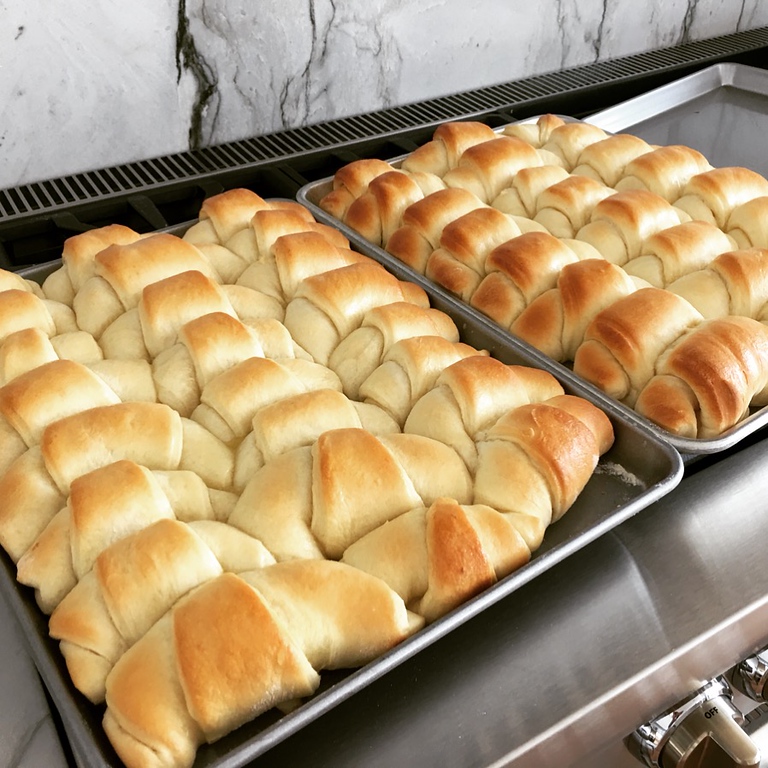
***Delicious Dinner Rolls***

Recipe found here

Using jellyroll pans give the rolls a great shape. Adding dough enhancer will keep these rolls fresh for up to 6 days stored at room temp in Tupperware or zip-lock bag. You will get exactly 4 dozen rolls every time!


In a large microwave safe bowl:
1 1/2 cups of milk (I prefer to use 1% or higher fat)
3/4 cup granulated sugar
1 stick of butter (1/2 cup)

In a 2 cup or larger sized liquid measuring cup:
1 Tablespoon sugar
2 Tablespoons active dry yeast
2 cups of warm water (100-110 degrees)

In KitchenAid Mixing Bowl:
9-10 cups of flour (I use King Arthur All-Purpose flour or Turkey bread flour from Costco).
3 Tablespoons, plus 1 teaspoon of store bought dough enhancer/conditioner (pictured below), helps preserve bread
1 egg, beaten
1 Tablespoon salt

2 sticks of butter for buttering the pans and baked rolls
Parchment paper


.................................................................................................................................
To Keep Bread/Rolls fresher for longer:
2 teaspoons of dough conditioner/enhancer (if using homemade version)
plus
2 Tablespoons gluten


Homemade dough conditioner:


¾ cup lecithin 

3 Tablespoons ascorbic acid
2 Tablespoons ginger
3 Tablespoons cornstarch

Store in air tight container at room temperature.


OR

2 Tablespoons from the can (it already contains gluten so you don't have to add that to it), if using the store bought (pictured below).

.................................................................................................................................

Scald milk, 3/4 cup sugar, and 1/2 cup butter in a microwave safe bowl, for about 4-5 minutes (or until butter is mostly melted).

In the KitchenAid mixer with dough hook attachment, add 4 cups of flour, salt, dough enhancer, and egg. Mix a few times with spatula to combine.

Meanwhile, in a measuring cup with 2 cups of warm water add 1 Tablespoon sugar, then 2 Tablespoons of yeast, mix slightly. Let it sit for a couple of minutes until it is bubbles up (proofed).

Now add the scaled milk, sugar, and butter to the KitchenAid mixer with the flour mixture. We are going to add yeast to this hot mixture, but it will be too hot to just dump the yeast mixture yet. To cool it down stir in 2 more cups of flour.


Keep track of how much flour you are adding!!!


Now add the yeast mixture, after it has proofed.

Gradually stir in remaining 9-10 cups of flour (counting the flour you have already added to cool it earlier, 3-4 cups of flour are left to be added). I would recommend adding 1 cup at time and stirring in between. You can mix these by hand in a large bowl or with a mixer. You will have to knead it by hand at the end.

I lay out parchment paper and knead the last cup or two of flour by hand.

At the end the dough will be dense and sticky, and may be hard to stir, you can use your hands to incorporate the rest of the flour if needed. Be sure not to add too much flour. You want to get it so it is no longer sticky, but you don't want to crumbly and falling apart from adding too much flour.

Then smooth the dough out and cover the bowl with plastic wrap (spray a little pam on the plastic wrap or sprinkle some flour on top of dough, so it doesn't stick). Leave it in a warm place and let it rise (about an hour). Let the dough rise until it has doubled in size.

When your dough is close to rising completely, butter 2 cookie sheets and set them aside.

AFTER THE DOUGH RISES 

Lay out parchment paper and lightly cover it with flour to prevent the dough from sticking. Dump your dough out and divide it into 4 balls. Eyeball the sizes, then lift them up and feel the weight of each ball. Try to make them even, but they don’t have to be perfect.

Using one ball of dough at a time: roll the dough into a circle on a floured counter. Once it is rolled out spread the top with butter from edge to edge. You will use about 2 Tablespoons per circle of dough.Cut the dough into quarters using a pizza cutter. Then cut each quarter into 3 pieces. You should end up with 12 triangles from each circle of dough.

You will roll the dough starting with the wide end of the triangle.Tuck the tail of the triangle under the roll and place it on the buttered cookie sheet. You will make 3 rows, with 8 rolls per row. This will give you 24 rolls per pan. Two balls of dough will fill 1 pan. You will get a total of 48 rolls!

Pre-heat your oven to 350 degrees. Place the pans of rolls in a warm place to let them rise, I cover them with a lightweight towel. They will need about 45-60 min to rise again.

AFTER THE 2ND TIME RISING 

Once they are full in size, bake (one pan at a time) in the oven until they are golden brown. About 10 – 20 minutes, It may take more or less time depending on how fast your oven cooks. Keep a close eye on your first pan to get the right time for the second.

While they are still hot out of the oven, brush with\ melted butter for a delicious buttery glaze.


Sunday, September 11, 2011

***Pumpkin Bread***

Tastes just like the box of Pillsbury Quick Bread. You can add chocolat chips, but I actually like it better without them. Makes two loaves. Fabulous with some powdered sugar on top when cooled.

5 eggs
1 29oz. can pumpkin
3 1/2 cups sugar
3/4 cup vegetable oil (canola works fine)
4 1/2 cups flour (half white/wheat works well)
1 1/2 teaspoons salt
1 1/2 teaspoons baking soda
4 1/2 teaspoons cinnamon
1 1/2 teaspoons nutmeg
1 1/2 teaspoons ground cloves
1 teaspoon ginger
1 1/2 cups chocolate chips (optional)
1 cup nuts (optional)

Beat eggs and other ingredients in order given, mixing well.

Pour into TWO greased 9x13 pans and bake at 350 for 25-30 min. If you use bread pans bake for 60-65 minutes or until toothpick comes out of center clean.

Sunday, March 13, 2011

***Garlic Bread***

(recipe found here)


1 loaf of crusty French bread
1/2 cup (1 stick) butter, softened
2 large cloves of garlic, smashed and minced
1 heaping Tablespoon of freshly chopped parsley, or dried (optional)

Preheat oven to 350°F. Mix the butter, garlic, and parsley in a bowl. Make 1-inch thick slices into the bread, but do not go all the way through, just to the bottom crust. Put a teaspoon or two of the butter mixture between each slice. Wrap the bread in aluminum foil and heat for 15 minutes in the oven.

Saturday, October 9, 2010

Pumpkin Muffins - healthy

(Anne B.)

Cover ½ c. raisins in hot water and set aside (optional)

Combine in a bowl:
1 ½ cups whole wheat flour
½ cup loosely packed brown sugar
½ teaspoon baking soda
½ teaspoon salt
¾ teaspoon baking powder
1 teaspoon cinnamon
scant teaspoon ground ginger
couple of shakes of ground cloves
couple of shakes of ground nutmeg
2 Tablespoons ground flax meal

Add all at once:
1 cup canned pumpkin
1 very ripe banana
½ cup applesauce
2 Tablespoons honey

Stir only until moistened. Drain raisins and add in.

Spoon into greased or papered muffin cups, makes 12 nearly-full muffins.

Bake at 350 for 15-20 minutes.

Thursday, February 19, 2009

Beanland Banana Nut Muffins - healthy

(from Beanland blog)

Preheat oven to 375 F.

Combine in a bowl:
2 cups whole wheat pastry flour
1/4 teaspoon salt
2 teaspoons baking powder
1/2 teaspoonbaking soda
1 Tablespoon cinnamon

Combine in the vitamix (or any blender) until soupy:
2 Tablespoon flaxseed meal (ground flax seed)
3 Tablespoons water
1/4 cup vegetable oil
1/2 cup unsweetened applesauce
1/4 cup brown sugar
3 ripe bananas
1 teaspoon vanilla extract


Pour wet into dry, and mix just until combined. This is when the rising starts, so make sure you don’t mix out the bubbles. Be gentle when you spoon into 12 muffin cups (greased or papered).

Top each muffin with two or three crumbled pecans and some brown sugar. Put them in the oven immediately (again, so they stay light).

Bake for 15-20 minutes until they spring back a bit when you touch the center.

Friday, February 6, 2009

Anne's Fabulous Whole Wheat Bread

Soft 100% Whole Wheat bread.


4 cups whole wheat flour (spoon flour into the measuring cup and level it off)
2 Tablespoons wheat gluten
1/2 teaspoon dough conditioner
2 teaspoon salt (may use 1 1/2 tsp)
2 1/2 Tablespoons canola oil (if you have unsweetened applesauce, use 1 T oil, 1 1/2 T applesauce)
2 Tablespoons honey
1 3/4 cup water
1 Tablespoon yeast (scant)

Put all these, in order and without the yeast, into the bread pan of your bread machine. Put the bread pan into the machine and select “Quick Bake” “XL” “Light” and press start. Then measure the yeast into the handy yeast dispenser at the top (or add with the rest of the ingredients if you don't have a dispenser). Press Start.

Dough Conditioner

¾ cup lecithin
3 Tablespoons ascorbic acid
2 Tablespoons ginger
3 Tablespoons cornstarch

Store in air tight container at room temperature.

Cinnamon and Walnut Version
Just add a heaping tablespoon of cinnamon and a couple of handfuls of walnuts, chopped. It smells heavenly when baking.

You can also purchase dough conditioner/dough enhancer online or in cooking shops.
http://shop.honeyville.com/dough-conditioner.html?gclid=CP2i--Gm38ECFYSPMgodNWMAPQ

recipe found here

Thursday, August 21, 2008

Berry Banana Whole Wheat Muffins - healthy

(Anne B.)

These light muffins are great and the tops come out perfect! They taste healthy, yet don't have the heaviness of the whole wheat.

1 egg + 1 Tablespoon flax meal/flax seed ground (you can use 2 regular eggs instead, or use equivalent amount of egg whites)
½ cup unsweetened applesauce
¼ cup vegetable oil
½ cup packed brown sugar
1 teaspoon vanilla extract
3 bananas, mashed
2 cups whole wheat flour
1 teaspoon baking soda
1 Tablespoon cinnamon
1 heaping cup frozen 3 berry blend (or any combination of berries)
brown sugar

Combine the first six ingredients and whisk together. In a separate bowl, combine flour, baking soda, and cinnamon. Slowly fold into the wet ingredients, don't over mix. Then add frozen berries.

Grease regular muffin tins and fill all the way up. Sprinkle with brown sugar (optional). Bake at 375˚ F for 20-25 minutes. Keep refrigerated.

recipe found here

Saturday, April 5, 2008

***ooh ooh ooh Cornbread***

(Shanda L.)


1 cup flour
1 cup cornmeal
1/2 cup sugar
1/2 teaspoon baking powder
1/2 teaspoon baking soda
1/2 teaspoon salt
1 egg, beaten
1 cup sour cream
1/3 cup milk
1/4 cup melted butter

Combine the dry ingredients in a bowl. Combine the wet ingredients in a seperate bowl, then stir the two mixes together with a big spoon just until moistened. Pour into an 8" baking dish at 400˚ for 20-30 minutes, or just until done. Check with toothpicks. It will get fairly browned.

recipe found here

Sunday, June 3, 2007

Rhubarb Jam

(Grandma H.)

4 cups diced Rhubarb
½ cup water
1 small box (3 ounces) cherry or strawberry Jell-O
2 cups of sugar

Cook rhubarb in hot water. When cooked, blend in blender or food processor to remove any remaining lumps. Return to pan, add Jell-O and stir. Add sugar and cooking and stirring until dissolved. Freeze or bottle and seal.